Resin craft is one of the fastest growing crafts in the UK, and it's popularity is very much down to the incredible level of creativity it affords, and the stunning artwork and jewellery that can be made with it. It's an incredibly exciting and interesting medium to work with and we wanted to share some tips and ideas to help get you started!
A brief background:
Traditionally a two-part epoxy resin was used, which would take some 24 hours to cure and set firm. Not only was the time an issue with this method, but also over time, the resin would tend to lose it's clarity and have a yellow tinge to it's appearance.
Nowadays, thanks to considerable technological innovation, UV resin has been created, both speeding up the process and providing longer term clarity for cured resin pieces. At the very forefront of this innovation are Japanese brand Padico, who we are delighted to work closely with!
In the past couple of years, they have developed and brought their amazing Star Drops UV-Led resin to market, this is the most advanced resin available anywhere in the world, and cures fully in 60 seconds!
Before we start - a few safety and storage tips:
Temperature: Keep it in a cool and dry place. Proper storage temperature is between 5 and 25 degrees Celsius.
Storage: Avoid strong sunlight, UV light can cure the resin.
Environment: Use UV resin in a well-ventilated space.
Protection: Consider wearing gloves to protect your hands and wash them after using UV resin. Please read the instruction from the manufacturer before using the resin.
Handling: When not using, cover the resin with a dark color cloth or lid to avoid curing by the UV light. This can help to prolong the usage time of the resin.
Cleaning: Acetone can be used to clean the tools for removing leftover resin.
OK - let's get started! What materials do we need?
- Padico UV-Led Resin
- UV-Led Light
- Resin palette / Mixing sticks
- Silicone soft mould of choice
- Chosen selection of colours, pigments, glitter, flowers
- Tweezers
* All of the above except tweezers are available in our store
Tips when working with UV-Led Resin:
Air Bubbles: These can easily be formed when pouring and mixing colours into the resin solution, to minimise this effect, ensure that the mixing is done slowly and gently, and use the sharp end of your mixing stick to burst any remaining bubbles before curing.
Sometimes however, you may wish to include bubbles, particularly in a water-themed design and in which case the opposite of the above will help to create this effect.
Adding Colour: When adding Padico colourants to your resin, you'll only need a small quantity to create a nice colour. The number of drops would depend on how strong you would like the the colour to be, and how much resin is in your mixing palette. In most cases a couple of drops will be sufficient.
It is possible to add more than one colour, to create a contrast or a blended appearance, or simply to create a brand new colour! If you feel the colour has become too strong, you can always add a little extra clear resin to dilute the colour.
Curing time:The UV-Led Resin on it's own will cure inside 60 seconds, however when using colourants, this may slightly extend the length of time taken to cure. This is especially the case with the white and black pigment which are very effective at blocking the light, and therefore these 2 colours will take the longest time to cure.
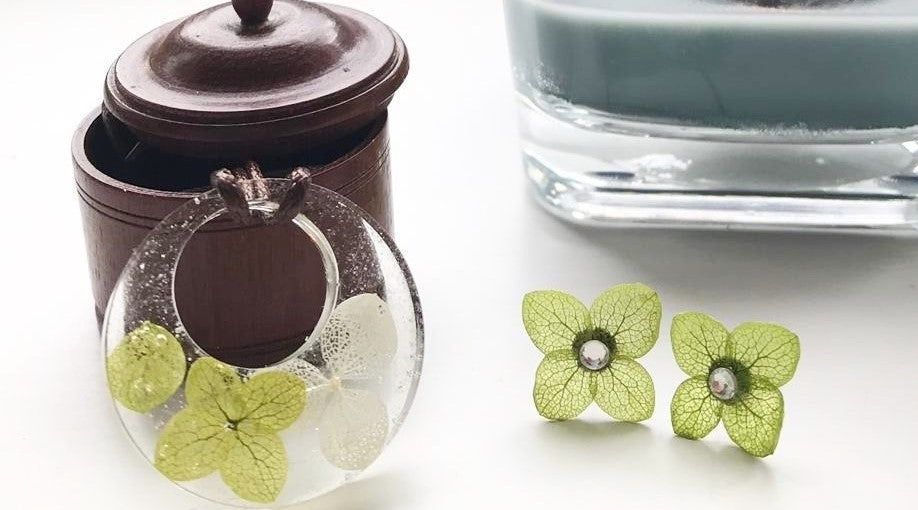
Inserting embellishments: In the above photo, the rectangular pendant features both glitter and flowers inside the creation. The glitter is mixed into the resin solution before pouring half into the mould. The flowers are then carefully placed on top, before the rest of the resin solutionis poured on top and then cured as one piece.
It is important to cure everything together rather than curing each layer, as this would create a line around the circumference of the finished
Finished appearance: It is possible to create a gloss, matte or pearlescent finish to your cured resin creation, by the application of the relevant Padico coating agent.
The recently released Padico Gloss and Matte coating series, and Pearl series colourants are designed to be brushed onto the surface of your creation once cured.
The gloss coating in particular has the added benefit of helping to smooth over any lines in your resin creation.
To make this easier, we recommend using the Padico Pon Pon Stand and Attachment Tool as demonstrated in the video below:
We hope these little pointers help and provide some inspiration for your resin creations. We always welcome any questions you may have and will be delighted to advise you. If you would like to get in touch please feel free to drop us a message!